
Sew Your Own Christmas Cushions
Christmas is fast approaching, and if you are like us, you will be busy planning and sewing your Christmas presents. One of the things that we have made as a gift, are these Christmas cushions! Aren’t they adorable – you just want to cuddle into them on a dark winter’s night in front of the fire.

They will make as great gifts for the family or how about as a thank you present for teachers/volunteers, or just treat yourself to some new Christmas cushions for home.
The best bit is, you can make your own, by following the steps below.
Supplies
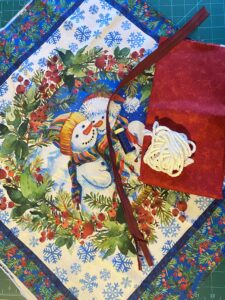
The supplies below will make up two cushions.
Finished measurements of each cushion are 45cm x 45cm approx.
- 1x “Year of Art – Winter Panel”
- 0.50m (112cm/44″ wide) backing fabric
- For our backing, we have used our “Spraytime – Christmas Red”
- For our cushion, the backing is made from one piece (as the zip is inserted at the bottom seam), if you want to have the zip in the centre back or create an envelope finish, you will require more backing fabric.
- 4.50m – 5.00m Piping Cord
- We have used our “Size 5 Piping Cord”
- Matching Thread
- 2x 22″ Zip
- We have used an invisible/concealed zip, which is sewn into the bottom of the cushion, in with the piping. If you rather not use this type of zip, just a regular closed end zip will do the job!
- 2x 20″ x 20″ Cushion Inserts
Method
Making the Piping Cord
- Cut out the main snowmen panels along the outer blue edge.
- Be careful when cutting out your panel, as we will use the sashing (holly border) for the piping.
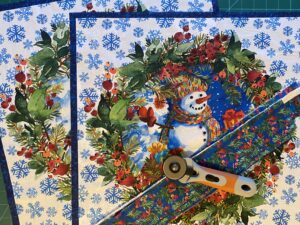
- Using the sashing, cut them down to 3cm/1.25″ strips.
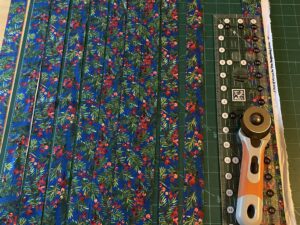
- Join the strips together, similar to how you create bias binding;
- Place the end of two strips right sides together, at a 90 degree angle and draw a diagonal line going across the “square” where the fabrics overlap.
- Stitch along this line
- Cut the seam allowance down to 6mm/0.25″ and press open.
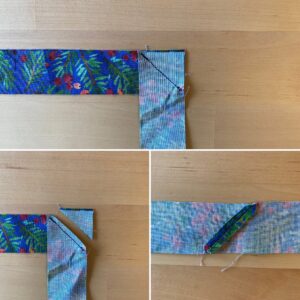
- Repeat the above, until all your strips are sewn together, to create one long strip.
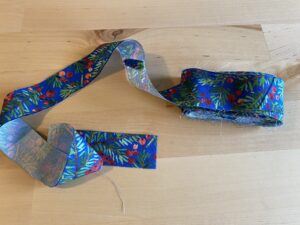
We are going to now add the piping cord into the fabric strip.
- Firstly, change your sewing machine foot over to a zipper foot (or if you have one, a piping foot)
- With your fabric strip wrong side facing up (right side facing down on the table), place your piping cord in the middle of the strip, and fold it in half, encasing the cord in to the fabric strip. Pin in place.
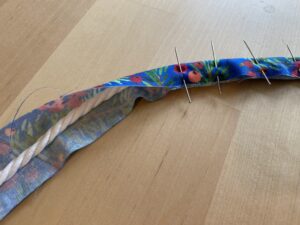
- Sew along the fabric strip, using you zipper foot.
- For this step you don’t need to worry about stitching too close to the piping cord, as we will get closer to it when we sew the cushion.
- Top Tip: As we will be stitching along the piping cord again later on, for this step, you can stitch using a longer stitch length.
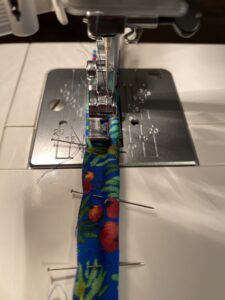
- You have now made your piping cord, so we are now ready to sew the cushion
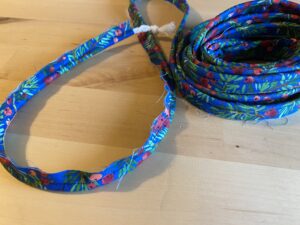
Sewing The Cushion (Stitching Piping Cord to Cushion Panel)
- Using your snowmen panel, and starting at the bottom edge, pin your piping to the right side of the panel, so that the raw edges of the panel and piping are lined up, and the piping cord is lying in towards the panel.
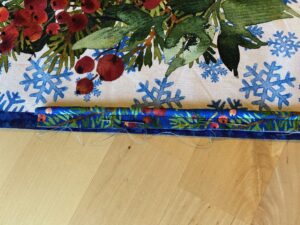
- Keep pinning the piping cord around the edge of the cushion.
- When you get to the corner, you won’t get a perfect squared corner. Simply bend it round, curving the piping cord, snip into the edge of the flanged edge of the piping cord, so that the piping cord lies flat on the corner.
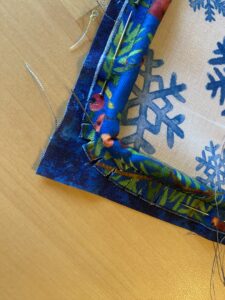
-
- Continue in this manner, until you get back to the start of your piping cord. Make sure the piping cord ends overlap by around 2.5cm/1″.
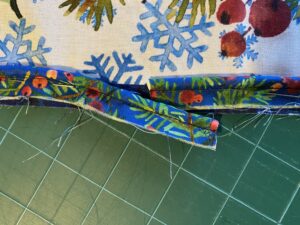
- To join the piping cord together, unpick the stitching on one end of the piping cord by approx. 5cm/2″.
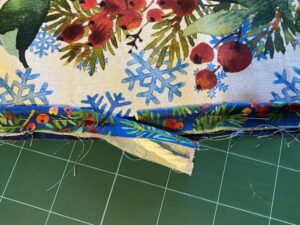
- Fold back the fabric edge (of the piping cord), back on itself, so to create a neat folded edge.

- Now take the other end of the piping cord and place it on top of the end of the piping cord where you have just folded the fabric edge over.

- Trim the excess piping cord, so that is butts up to the end of the piping cord (or so that it extended past it by 6mm/0.25″)
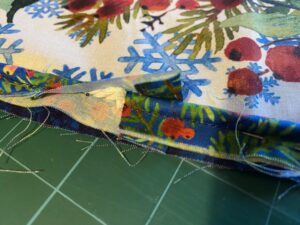
- Folding the unpicked part of piping cord fabric over the cord ends, so that it encloses the ends and pin in place
- Your piping cord ends should now be joined together.
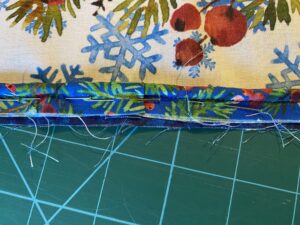
- Head over to your sewing machine and now stitch your piping cord in place – making sure to use your zipper foot (or piping cord foot).
- You can use a longer stitch length again at this stage, as we will eventually sew around the piping cord a third time, when we adding the cushion back.
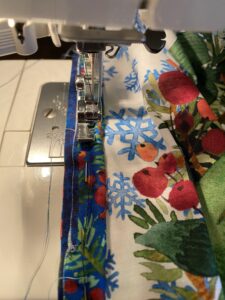
- Your cushion panel should now look something like this. Repeat the above to sew the piping cord to the second panel.

Sewing The Cushion (Stitching the Cushion Back to the Front)
The cushion back is made from one piece (as the zip is inserted at the bottom seam). If you don’t want to use this way, and instead rather make the backing your preferred way (for instance having an enveloped back or a zip in the centre back instead of trying to get it in the bottom seam), then skip the next few steps.
- From your backing fabric, cut out two squares (one for each panel) that measures the same as your Christmas snowman panel.
We are now going to insert the zip on the bottom seam
- On the bottom edge of your panel, find the centre point and mark it. Do the same to find the centre point of your zip (make sure you zip is opened up)
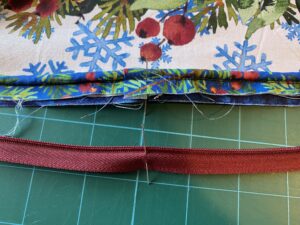
- Lining up the centre point of the panel and zip, pin the zip in place (so that it is right side down on to the right side of the back).
- You want the zip teeth to be as close to the piping as possible.
- If you are using a concealed zip, you may find it easier to first press open the zip teeth to help with this step. Be careful that your iron isn’t too hot, or you could melt the zip!
- Your zip ends will likely extend past the cushion panel. This is fine, as we will cut it down later on.
- You want the zip teeth to be as close to the piping as possible.

- Using your regular zipper foot, sew the zip in place. You want to start and stop sewing 2″ in from the end of the cushion panel. (Make sure that your stitch length on your sewing machine is back to the standard length).
- This step is a little fiddly, so take your time. If it’s easier for you, you can hand baste the zip in first.
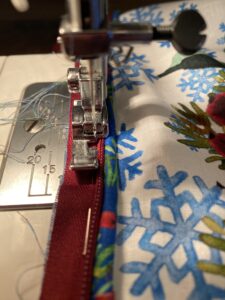
- Now that tricky step is done, sew in the other side of the zip to the backing fabric.
- Match the centre of the backing fabric to the centre of the zip and make sure that the backing fabric and cushion front are lined up too.
- When sewing this half of the zip in, you can swap your sewing foot over to a concealed foot. If you don’t have one, you can still use your regular foot.


- Open up the zip halfway and place the cushion front and back right sides together. Pin the unsewn edges of the zip seam.
- Changing your sewing foot back to your regular zipper foot, stitch in place, sewing as close as possible to the piping cord.

- You can now trim down the excess zip tape.
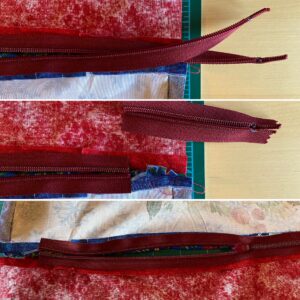
- Keeping the zip halfway open, position the cushion back and front right side together. Pin around the three edges and stitch close to the piping cord as you can.
- When you get to the corners, you may find it easier to use your hand wheel for more accuracy, and pivoting around the piping corner after every couple of stitches.
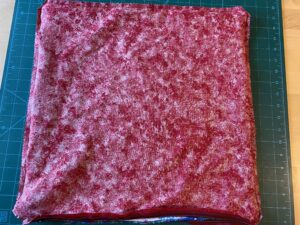
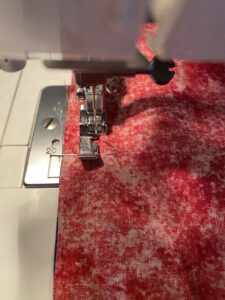
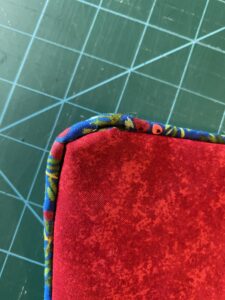
- Turn the cushion right side out, and check your stitches. If you see any line of stitches from the previous steps, you haven’t sewn close enough to the piping cord.
- In these instances, turn the cushion inside out, and re-sew those areas. Don’t worry if you need to do this a couple of times, especially around the corners (like the photo below). We don’t always get it right first time either!
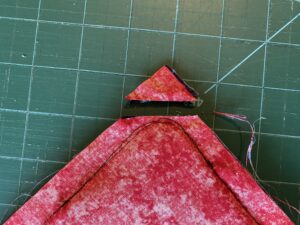
- Once you are happy with you stitching, keeping your cushion inside out, cut the corners on an angle to create a pointed corner.
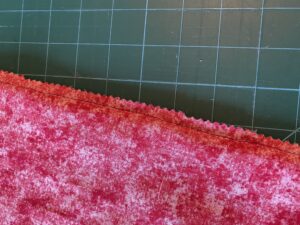
- You can also trim down the fabric edges with pinking shears to prevent your fabric from fraying.
- Turn your cushion right side out and insert your cushion inner.
CONGRATULATIONS, YOU HAVE NOW SEWN YOUR VERY OWN PIPED CHRISTMAS CUSHIONS!